Monthly Archives: March 2012

Fabulous Friday Favorites – 4!

Standard

Babies don’t need a vacation, but I still see them at the beach… it pisses me off! I’ll go over to a little baby and say “What are you doing here? You haven’t worked a day in your life!’
Steven Wright

I have no words to describe the absolute love I have for the beach.  It’s a weird kind of love/hate deal which makes the feeling even that much more intense.  The love is:   the sound of the waves, the sand between my toes and sitting in a chair with an umbrella over me and a good book.  The hate is:   that I never fail to burn the bejeesus out of myself, sand in everything I own and of course, being in a bathing suit.  But none of this matters once I am there.  It’s vacation and it’s time to relax.  Heaven!

I think it is no surprise what my Fabulous Friday Favorites (FFF) will be today since we are headed to the beach.   Spring Break Baby!

1.  PORCHES ON THE BEACH:

The best part about sitting on a porch on the beach, at least for me and my fair Irish skin, is the shade.  Oh and a comfy chair, access to the kitchen and a nap!

Here are some amazing examples of some porches on the beach.

Source: bhg.com via Missi on Pinterest

Source: creamylife.com via Missi on Pinterest

Can you imagine yourself on any one of these porches? I can see myself laying on one of those swing beds (of course I am skinny, tan and in a bikini) reading my decorating magazines and drinking something fruity with an umbrella.  A girl can dream – right?

2. OUTDOOR SHOWERS:

I have only been in an outdoor shower a couple times in my life and I must admit, there is nothing like it. It can seem unnatural being naked outside, but let me tell you it is freeing and you will never want to bathe indoors again. I would not suggest doing this on your driveway with a garden hose however … unless you are in to shocking the neighbors and being thrown in jail. Just saying …

Source: dwell.com via Missi on Pinterest

Source: ginger-ella.tumblr.com via Missi on Pinterest

OOOh – does he come with this shower? Just kidding hubby!

Source: amzn.to via Missi on Pinterest

Source: houzz.com via Missi on Pinterest

3. ADIRONDACK CHAIRS:

Who doesn’t love a comfortable adirondack chair? They just scream “sit in me and don’t get up until you are totally happy and relaxed!” Or wait – maybe I am screaming “I’m trying to sit and relax and I am NOT happy” at my kids. Either way – I love myself an Adirondack!

Source: google.ca via Missi on Pinterest

Source: google.com via Missi on Pinterest

Source: google.com via Missi on Pinterest

Source: google.com via Missi on Pinterest

Source: google.ca via Missi on Pinterest

Source: google.com via Missi on Pinterest

Source: prepfection.tumblr.com via Missi on Pinterest

All is can say is WOW!  I am in love …

That’s it for this week’s FFF’s. I hope there is a porch, outdoor shower or adirondack chair in your near future. Hate to rub it in, but it’s in mine … I leave tomorrow! Have a safe and happy weekend!

Hope your life is more heaven than havoc!
Missi

Fun Things to do with Glass Jars!

Standard

Happy Thursday! The week is almost over and spring break is on the horizon. I know my kids are counting down the hours … and are pretty much over school for the week.

I love glass jars. I love them clear, in color, empty or full of cool things! Here are a couple things I have done with glass jars lately:

This is the shelf I put over my large window over the kitchen sink.  The three glass bottles on the left side are just plain antique green glass bottles.  I like them just all by themselves.  They are printed with a raised logo that says”1868 Honey”.

Just a small skinny bottle from Hobby Lobby adds a little color to a centerpiece tray.  This on my table in the banquette area.  Check out some additional things to do with simple bottles …

Source: thepaintedhive.blogspot.com.au via Daria on Pinterest

Super cute clear labels with the dictionary definitions of your basic baking staples. I love the way this looks.

Source: etsy.com via Bridgette on Pinterest

How cute are these? Painted with oven-fired paint to make them dishwasher safe. Perfect for spring or Easter decorations too!

Source: marthastewart.com via Julie on Pinterest

Terrariums in glass jars are so perfect as decoration in any area of the house. I like the addition of green in any room – it adds interest. Just really fun to look at!

Source: oncewed.com via Amika on Pinterest

Go out in your yard (or your neighbor’s yard in the dead of night – I’m not encouraging just suggesting) and pick some flowers. Wild flowers with long stems look really cool in these clear glass bottles.

Source: happyclippings.com via Jamie on Pinterest

These jars are just covered in scrapbook paper with bows made from string and ribbon. Aren’t they cool? Any paper can be used to go with the decor of your house. Love it!

Source: bridalbuzz.blogspot.com via Noryne on Pinterest

Simple Ball jars you can buy at any local grocery store + a little twine + a small bunch of flowers = vintage heaven.

Source: happyclippings.com via Lara on Pinterest

Here is another example of a great use of chalkboard paint.

Source: karapaslaydesigns.blogspot.com via Joie on Pinterest

Putting your collections in vintage glass jars make them look really unique and interesting. These would look great on a shelf behind your bar in the basement.

Source: scrapbooksetc.com via Mara on Pinterest

Organize your crafts in a way where you can not only see what you have, but it looks fabulous too!

Source: eighteen25.blogspot.com via Kristin on Pinterest

These candy jars are made out of old pickle jars and then set on candlesticks that have been spray painted white. Awesome!

Source: markmontano.typepad.com via Heather on Pinterest

Are you kidding? How easy is this? Wrap some twine around a jar – spray paint and Wa La … Huge Impact!

Source: tatumgreatindoors.blogspot.com via Missi on Pinterest

I am head over heels for this candle jar fixture for a screen porch. I can’t wait to build a porch just to have this hang in it. Wow!

Source: sixinthesuburbsblog.blogspot.com via Missi on Pinterest

And last but not least … I think this is my favorite way to use a simple Ball jar. Don’t be surprised if next time you come to my house for a party you will be drinking out of a jar.

Hope your life is more heaven than havoc!

Missi

I am linked up today at http://www.serenitynowblog.com/.  Come Check it out!

Visit this post on:  http://www.craftytexasgirls.com/2012/04/cowgirl-up-9.html and lots more!

It’s a Small World After All …

Standard

Hi Friends – Old and New!

Yesterday was my one month blog-a-versary!  I promise I won’t do this to you every month – just the big milestones!  I hope you have had as much fun reading my posts as I have had putting them together.  I can’t thank you enough for going on this ride with me.

I have just been amazed at how small the world becomes on the internet.  When I started writing this one month ago, I was just thinking about some family and friends checking out the changes I have made on the house we purchased.  I started throwing out my two cents on some home decorating ideas, showing off some before and after’s and found out that I have a lot to say.  Who knew?  Boy – have my eyes been opened to how your words and pictures can mean something to people from all different places.

As of last night, my blog has been viewed over 2,000 times in 34 different countries – take a look at this list:

United States, Canada, United Kingdom, Germany, Australia, Finland, France, Netherlands, Poland, Brazil, Norway, Sweden, New Zealand, South Africa, Saudi Arabia, Italy, Mexico, Turkey, Luxembourg, Malaysia, Israel, Argentina,Ireland, Croatia, Hungary, United Arab Emirates, Austria, Estonia, Portugal, Ethiopia, Greece, Iceland, Switzerland and Thailand.

To those that have been blogging for a long time – I am sure my numbers seem a little wimpy, but to me it is overwhelming.  To see your passion appreciated by people from Iceland or Estonia – come on … crazy!  I am humbled by the wonderful comments and to those that have taken the time to sign up to follow my little blog.  Thank you so very much!

Oh – I did want to let you know that if you follow me via e-mail, please be sure to click on the title of my blog on the e-mail to bring you to my actual blog site.  I don’t get credit for your view if you just read the e-mail.  I know it is one more step … but it means a lot to me!

“Being Grateful is like peeing on yourself: everyone can see it, but only you get the warm feeling that it brings.” – Anonymous

Thanks for letting me pee myself everyday …and as always:

Hope your life is more heaven than havoc!

Missi

Teach Me Tuesday – Chalkboard Pots!

Standard

Hi All – Welcome to my second Teach Me Tuesday! Here is an easy project that even your kids could tackle (maybe for Mother’s Day – hint hint)!

These chalkboard pots can be used for many different things: herbs, flowers, pen or pencil holder for your desk, girlie items or even hold your kitchen utensils.

Source: michaels.com via Laura on Pinterest

Here are the steps to tackle this project.
Step: 1

Start by masking off the rims of the pot, as this area will be left unsprayed. Lay down newspaper to protect the surrounding area.

Step: 2

Take the Chalkboard Black and spray over the unmasked area, leave for 15 minutes then apply a second coat.

Step: 3

Leave to dry thoroughly for at least 60 minutes. While waiting, take the pencil and practice writing the names of your herbs on a scrap piece of paper.

Step: 4

Once the Chalkboard paint is dry, write the names of the herbs on each pot using the chalk.

How super easy is that? Can’t wait to put some beautiful Gerbera Daisies in mine. Gerbs are my favorite flower!

Take a look at some additional pictures for inspiration …

Source: laniejandco.com via Mandy on Pinterest

Hope your life is more heaven than havoc!

Missi

Make Your Front Porch Say “Welcome”!

Standard

Well … another Monday after a busy weekend.  The weather was beautiful – thank goodness with all we had going on.  My parents are here on their way back to Minnesota from a winter in Florida.  I love this visit every year – the trees are blooming, lacrosse is in full swing and it’s Prom weekend.  I am going to include a few pictures of Prom, mainly for family or friends that might be interested.  If you want to skim right through these … be my guest. You won’t hurt my feelings.

Saturday was crazy – my daughter and I left early to drive to the beauty salon to have her prom up-do done. We had prom pics with 30 couples at 5:00 and then we hosted the after party.  It was a loooonnnggg night for mom and dad, but kids had a blast.

Here are some pictures …  An amazing braided bun:

Isn’t it so unique and beautiful?  We found it on Pinterest – Bryce Dallas Howard was wearing it to some award show.  I printed the picture and the girl at the salon whipped it right up – she was amazing!  We liked it even more than the pic!

Iridescent drop earrings matched the beads on the dress.

This is the clutch she carried.  It is Blush and matched her shoes and nails perfectly.  You know how important that is?!

Da da da …. the dress!

Here is the beading at the top of the dress.  It is a pewter color and just gorgeous!

The full dress.  Okay … here is the story on the dress.  I found this dress on ebay.  It is made by a company in China who reproduces celebrity dresses and beads all their dresses by hand.  It is called celebritydresses.com.  Sounds a little spendy, right?  Nope – dress was $139.00 – yes you heard that right … $139.00.  But what about shipping – it is coming from China?  $39.00 – uh huh… Grand total was $178.00.  I don’t know if any of you have ever bought a prom dress, but they are crazy expensive.  I was stupid last year and paid $548.00 – what was I thinking??  Never again.

Here is it all together …

Beautiful day, nice date and great friends!  They had a wonderful time.  If you can believe it … the fun did not end until 10:30 a.m. on Sunday.  Prom is quite the adventure!

Alright … enough of my gushing.  On to the front porch!

Your front door and/or porch is the centerpiece of your home.  It is where your first impressions are made and can determine if your guests feel welcome or not so special.  It is really easy to make your front entrance welcoming.  Just a few simple items and you can change the front of your home from sad to a big, warm smile!

This is my front door.  It was originally a solid front door – with cracked white paint.  We replaced the door with a glass door to bring light into the foyer.  I like the look of a glass door – but I know it is not for everyone.  It can be a problem for privacy – especially if someone comes to the door you don’t know – you can be a little vulnerable.  If this happens to me, I just roll off the couch and hide on the floor.  Not really … but I have thought about it.  One of the most favorite things I did to the outside of my house is paint around the windows in SW Rustic Red.  I will show you some before and after’s of the outside of our house in another post.  I love how it turned out!

This is the empty right corner of the porch.

Left side is also empty and not happy at all!

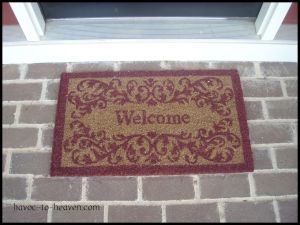
First add a welcome mat.  Let me just say that I like the colors in this mat … but it is waaaaayyy too small and is driving me crazy.  This will have to be replaced.  But for now it will have to do.

The next thing I wanted to do was add a chair to the corner.  I had an old chair that had been exposed to the elements for a bit too long.

Just a plain, old chair – no real character.

Here is a close up … can you see how weathered it is?  Now – just a can of black spray paint and TA-DA!  New chair!

Ignore the pollen … I tried to wipe it down – but couldn’t wipe fast enough.  Pollen is the Pits!

Add a pillow.  This is a burlap (one of my Friday Favorites) pillow – monogrammed with our house numbers.  I actually ordered this from Pottery Barn – it was on sale and very reasonable.  Instead of monogramming with initials – I did it with the numbers instead.  I like the way it turned out.

Close up of the pillow.  The red matches my window trim exactly.  Yay me!

I added a couple cheap lanterns that I picked up at Hobby Lobby.  The candles inside (again a rustic red) are the flame less candles that turn on by themselves on a timer.  It is such a welcoming look when the candles light up the lanterns at night.  This is such an easy way to make a big impact on warming up your welcome.

This is a super funky “S” I picked up at an Antique Market.  I love the colors in it and it is the perfect size.  You can see it from the street, but it is not obnoxious.

Here is a better shot of the colors and textures.  Really unique and one-of-a-kind.

Put a wreath on your front door.  Nothing says welcome like a beautiful wreath that goes with the season.  This is my spring welcome wreath.  I purchased this on Etsy.com and I adore the colors and the butterflies!

Here you can really see those butterflies!  This shop on Etsy does the most beautiful wreaths.  They last forever and make such a statement.  I think it’s worth it.  You can take a look at – http://www.etsy.com/shop/LuxeWreaths?ref=seller_info.  You could also make your own – I haven’t tackled that project yet.

Want to see it all together? Here are the current after pictures.  I have some pots with flowers coming and few other surprises – I’ll post those pictures later.

See how simple and easy it is to change the entire look of your porch or front door?  The longest time anything took on this fix up, was spray painting the chair and that was done in less than an hour.  You can welcome your friends and family to your home by adding a few simple items … it will make you smile and will make them feel at home.  Give it a try!

Hope your life is more heaven than havoc!

Missi

This post has been linked up at:

http://southernhospitalityblog.com/spring-fling-link-party/spring_fling_button_rhoda/

Check out the Spring Door Party!


Fabulous Friday Favorites 3!

Standard

Hello All!

I can’t believe how fast these weeks are flying by … it seems like I just did a Fabulous Friday Favorites (FFF) and now here it is, Friday again.  Do you ever get freaked out by how fast your life is passing by every day, every month and all these years?  I think it goes extra fast when you have children.  I am going to have 4 teenagers this year.  I can’t even fathom that I am old enough to have 4 teens!  I feel like a was just a teenager myself and God knows I still act like one on most days.

Notice I said “act” not “look” like one.  What’s the deal with everything falling on your face and body?  Before I know it my butt will be behind my knees and my boobs ….   I can’t even think about it!  Oh – and what is going on with my eyelids?  AAAARRRGGGHHH!!

Moving on … I hope you enjoy this week’s FFF!

1.  SUBWAY ART:


I can’t say I know for sure the history of Subway Art.  I tried to do some research, but all I came up with is that it originated in the subways in New York City.  Alot of that art was graffiti-based.  The subway art I am loving right now is the word art.  You have probably seen it – it is popping up everywhere.  I remember the first time I saw a piece of subway art was on a show on the DIY Network.  It was a long, wooden and black sign with white words listing out all the stops on a NYC subway train.  I thought it was so cool.  Now you can find any word grouping you can think of:  inspirational, holiday, baby, cities and a whole lot of others.

I got this piece of Minneapolis subway art from my sister for Christmas this year.  I love it so much.  Not just because it is cool and super trendy right now, but because it speaks of home.  I grew up in Minnesota but have been gone for 19 years.  Every one of these words have meaning to me and a memory attached.  I saw the Twins win the World Series in the Metrodome in 1987, my first real job was in a building right off the Nicollet Mall and I nervously merged into freeway traffic for the first time (in a orange Thunderbird) onto 35W.  Art should invoke a feeling in you … this one definitely does for me.

Here are some other examples of subway art that might mean something to you:

Source: etsy.com via L on Pinterest

Source: etsy.com via stephanie on Pinterest

Source: lilluna.com via Crissy on Pinterest

Source: etsy.com via Jennifer on Pinterest

Subway art is awesome! And … you can even do it yourself. More on that on another post. Exciting stuff!

2. LIGHT BULBS:

I know this seems like a weird favorite, but you would be amazed at all the cool things you can do with a light bulb. Besides the fact that the look of the bulb can completely change the feel of a light fixture, bulbs can be used in so many other ways. Take a look …

Source: bing.com via Leslie on Pinterest

Source: postnet.com via PostNet on Pinterest

Have I convinced you that you should never throw away an old light bulb? So many creative ideas – one is better than the next!

3. FLOWER BULBS

Yep … this is another one of my favorites. I don’t just love light bulbs, but this time of year I am dying over all the beautiful flower bulbs coming up.  Sigh … the pollen is terrible but the flowers make it worth it.

Source: bhg.com via Suzan on Pinterest

Source: google.com via Azure on Pinterest

Source: kodak.com via Jan on Pinterest

Source: google.com via Janet on Pinterest

Source: dutchbulbs.com via Kathy on Pinterest

I have planted all these bulbs in my garden this year. I just hope they come up as beautifully as these pictures. I’ll take some pictures when they start to peek through a little more.

Well that’s it for this weeks edition of FFF. Hope you have a wonderful and safe weekend. See you Monday!

Hope your life is more heaven than havoc!
Missi

One Word …POLLEN!

Standard

Today’s post is about one “dirty” word ….  POLLEN!  It’s killing me and crushing my creativity.  How can I blog when I can’t swallow, see or even breathe?  Here is the hood of my car:

I know you can’t see how yellow my hood is … but those of us who live in Georgia know what I am talking about … NIGHTMARE!

In order to be semi-creative and stay with today’s theme, I have included some Pollen Art for you to cringe over enjoy!

http://www.smh.com.au/ffximage/2005/08/09/pollen_wideweb__430x268.jpg

Has this guy lost his mind?  He doesn’t even have a mask on.  What a show-off!

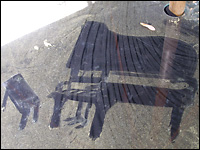
http://  madsilence.files.wordpress.com/2007/09/a-piano-drawn-in-pollen-by-louisa-bailey.jpg

This makes the sad face I drew on my car look pathetic.

http://madsilence.files.wordpress.com/2007/09/mona-lisa-starry-night-peak-by-scott-wade.jpg

Someone has waaaayyy too much time on their hands.  Really.

I have to admit … very impressive.

http://cache.daylife.com/imageserve/0feb0Dk09D85A/610x.jpg

This is a little more my speed.  Banjo playing stick figures … now that’s art!

http://www.blog.designsquish.com/images/uploads/five-mountains-not-to-climb-on-sculpture-wolfgang-laib.jpg

This “piece” is called Five Mountains Not To Climb. Art really is subjective.  I’m pretty sure I could make this on my driveway right now.  I just choose not to (smile)!

Had enough?  Yep – me too!  Gotta go blow my nose and gargle with salt water – I lead such a glamorous life!

Hope your life is more heaven than havoc!  Stay away from the Yellow!

Missi

Decorating with Books

Standard

“A room without books is like a body without a soul.”

This quote by Marcus Tullius Cicero could not be more true for me and my family.  We are huge readers and have books everywhere.  We have a hard time parting with books even after we have read them.  Each  book holds a memory of a story that we were a part of  – even if just for a little while.

I was asked by another designer the other day, “what is your favorite home decor accessory?”  Without hesitation, my answer was BOOKS!  Books can add color where there is none, height when you need it and fill in empty spots without looking forced.  Take a look at some pictures today of decorating with books:

3.bp.blogspot.com

This is a good example of using books for both color and height.  Just stack a couple books on a table and put a vase on it to really make the flowers a statement.

1.bp.blogspot.com

Look at how great it looks to just stack a bunch of books on a colorful table.  It sort of looks like you didn’t try to make it look good but it just kind of “came together”.

frugalflourish.blogspot.com

A whole wall in a child’s room decorating in books!  I love this!  It’s colorful and interesting and really shows off how important books are to this family.  I would love this in an office with books on your passion – like all home decor books!

lemontreecreations.blogspot.com

This is a totally different look in a child’s room but just as wonderful!  The books have all been turned backward so the pages are showing instead of the spine.  It has a monochromatic look which is contemporary and simple.  Very serene for a nursery – but how do you find the book your looking for?  I have a feeling these books are for “looks” only!

apartmenttherapy.com

Have a ton of books?  Organize them by color to get this look.  I like the way these shelves look coordinated – but I’m not so sure about the next picture.

aiminglow.com

Now I will be the first girl to admit that I love color – but shelves with rainbow books even goes a little far for me.  What do you think?

nauticalcottageblog.com

I love this old ladder with the words painted down the side with the old books on the rungs.  These books are pretty easy to find lately.  I have seen them at antique stores and flea markets.  Just a little side note … I always take my book jackets off my books.  I prefer the solid color underneath as well as the texture.  The shiny jackets don’t always give the look I like.  I do save the jackets, however, in a big storage bin in the basement.

http://nauticalcottageblog.com/2011/06/glorious-old-books-as-cottage-accents/

How beautiful is this?  So simple on a buffet or mantle.  You could go with bold colors or something really soft like this picture.  I love it!

bookstorecouture.tumblr.com

Ummm… an owl on top of Pride and Prejudice?  Need I say more?

theartofdoingstuff.com

I chose this picture to show you how you can turn books in different directions to make more of an impact.  I, however, would have taken the jackets off these books … but that’s just me.  Imagine the books in solid colors instead of the distracting words, colors and pictures.  Just one girls opinion.

houseandhome.com

Gorgeous!  Books used as a table is a cheap and interesting way to decorate any room.  You could even put a piece of round glass on top and make it a larger end table.  Really easy.

blog.designsquish.com

Floating book shelves made with books.  I think this would be amazing in a small bedroom that may not have room for a traditional bedside table.  You could put one of these next to the bed, on the wall, and always have reading material as well as somewhere to put your phone.  The best part is that you can change the look as easily as changing the books.

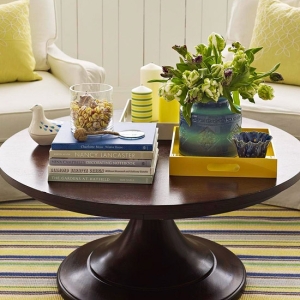
bhg.com

Coffee tables are a great space to decorate with things you love.  I like to organize items with a big tray or two and then add a stack of books to put something of prominence on top.  Try to group similar items together.  Maybe one tray has candles of differing sizes and the other has bowls or frames or figurines.  Makes a room look so cozy and homey!

picasaweb.google.com

And what would a book blog post be without books in the bathroom …

apartmenttherapy.com

Okay … let’s not get carried away!

Hope you enjoyed all the ideas to decorate with books!  If you did, please pass it on to friend and/or follow me! Thanks!

Hope your life is more heaven than havoc!

Missi

Be sure to check out this post and more at the Linky Partys at:

http://www.serenitynowblog.com/2012/03/weekend-bloggy-reading-link-up_23.html#more

http://missmustardseed.com/2012/03/furniture-feature-friday-feature-link-party/

Teach Me Tuesday!

Standard

I thought Tuesdays might be a good day to try to teach y’all a project that you could try yourself at home.  Sometimes the project will be something I have done and other days (like today) it may come from another source, but I also plan on tackling one day.  I think you will be surprised how easy it is to get something you covet by making it yourself.  I love it when I see something that is way out of my price range and copy it for so much less.  It is the best kind of DIY high!

Today’s Teach Me is learning to create your own Sunburst Mirror.  I have been seeing these all over town and let me tell you – they are spendy.  They look amazing in dining rooms, bedrooms, foyers and over a couch in your living room.  Really anywhere!

Materials Needed:

  • mirror with flat frame edge
  • 150 pieces branches or twigs
  • glue sticks
  • glue gun
  • painter’s tape
  • yardstick
  • hacksaw or other saw
  • sandpaper
  • sheet of paper
  • spray primer
  • spray paint
  • hanging hardware

Gather Supplies

Select materials and cut branches to varying lengths between 15 to 18 inches long. Tip: Attach hanging hardware on back of frame prior to starting project.

Tape Guidelines

Tape intersecting lines to mirror surface. Using tape lines and yardstick as a guide, glue first branch to mirror frame surface.

Create Radiating Circle

Glue branches in place using guidelines to create a radiating circle around mirror frame, providing guide for attaching remaining branches.

Glue Branches to Frame Edge

Apply ample amount of glue to frame using a hot glue gun and secure each branch. Tip: Hold branch in place for several seconds while glue sets.

Vary Branch Lengths

Attach branches to mirror, varying lengths of adjacent branches for a balanced final result.

Complete Circle

Continue attaching branches around mirror frame until a full circle is created.

Sand Branches

Sand top sides of branches with sandpaper to remove any excess glue.

Protect Mirror Surface

Cover mirror surface with paper and apply painter’s tape around inner line of mirror to protect mirror surface while painting.

Prime Backside of Mirror

Spray backside of mirror and branches with primer. Let dry to touch, approximately a half-hour. Tip: Stacked paint cans provide a convenient stand to place mirror while painting.

Prime Front of Mirror

Turn mirror over and place on stand front side up. Prime branches and mirror frame. Let dry to touch, approximately a half-hour.

Paint Mirror

Repeat above steps to paint front and back of mirror. Let dry 24 hours. Remove protective paper and hang mirror.

http://www.hgtv.com/living-rooms/create-a-sunburst-mirror/index.html

Okay … not so bad is it?  I want to show you some other pictures of some DIY Sunburst’s – just switching out the twigs or branches for another material can completely change the look and feel of this mirror.  Use what you like and what feels like it will fit in with your decor.

http://www.sortofcreative.com/2011/08/369-sunburst-mirror-tutorial.html

This mirror is made with chopsticks.  A little more contemporary.


frugaldecormom.blogspot.com

I think this one is my favorite – it is made with rulers.  You could also paint the rulers in your decor color or colors and then distress them … so cool!

shop.thefoundary.com

Just to give you some perspective … this mirror sells for $375.00.  Do you see what I mean?  You can do this!

twenty-six-to-life.com

This Sunburst is made from cedar shims.  These are so cheap and super easy to find at any local hardware store.

Come on Friends … you can make this mirror in a day … I promise you!  Be sure to send me a picture of your finished product.  I can’t wait!

Hope your life is more heaven than havoc!

Missi

Stairway to Heaven

Standard

Happy Monday!  Does anyone else get the Monday blues?  The weekends zip by so fast and next thing you know the alarm is blaring early Monday morning.  On one hand I like the routine of the week – on the other hand – “please just 5 more minutes of sleep”!  I can press the Snooze with the best of them!

The post today is based on the staircase in our home.  I despise it! The risers are too steep and the steps are too narrow.  We tried to have it fixed – but we don’t have enough room to move the steps out or turn them.  Every visitor that has stayed in our home has commented on how steep the stairs are … Ugh!  My husband has even ended up overstepping a narrow step and bumping down on his butt.  You won’t believe how loud that is at 5:00 a.m. when he is leaving for work.  Yikes – scared me to death!  Then  I laughed hysterically – once I knew he was okay – of course.  I’m such a sympathetic gal!

Now we have a super thick – extra sturdy handrail – be sure to HOLD ON if you ever come to visit!  Here are our stairs before …

I’m not sure if you can tell how narrow and steep the stairs are in this picture – but I know you can tell how plain and boring they are!  Here’s the after:

I really like the carpet we put on the stairs – it looks much better.  The flowers are sage green and the lattice is green and chocolate brown – all on a khaki background.  We wanted to make the stairs hardwood with a runner, but it was physically and financially not in the cards!  Our steps look good but wait to you see the stair risers I’m posting today.  So incredible!  Let me know what you think?

We used to have stairs very similar to these in a house we lived in about 3 years ago.  The stairs led to the basement and had a different Mexican tile on each stair riser.  I bought the tile from a gentleman in San Diego who would go to Mexico and bring back the most beautiful and colorful tile.  I loved the stairs – I think they were my favorite part of this house and I hated to leave them.

Photo of numbered stairs in French found on Hiphostess.blogspot.com

White, painted stairs numbered in French – pretty great!  However, white steps would never fly at the Smith house.  These steps would be dirty brown in about a week and it would drive me nuts!

Now these are more the Smith style.  Numbered risers with a worn, rustic look.  The more worn out they get the better they will look.  Awesome!

This is a true Beatles fan … each riser painted with a different Beatles lyric.  How cool would this be going down to a basement game, music or theater room?  Really incredible the amount of time that went into this look … I think it was worth it!

Ummmm…. Are you kidding me?  NO WAY in H – E – Double Hockey Sticks!

Happy Yellow Stairs!  Can you say anything else?  Gorgeous!

I am in love with these stairs!  The one riser with red on it makes it outstanding!  How amazing would this be in a beach house?  I’m drooling.

Even though putting orange flower tile on your risers may seem to limit your decor – think again!  This will always make a statement and can be used with any decor!  Orange is everywhere!

Black and white – always in style.  Sophisticated, classic and beautiful.  I would love this in an updated cottage!

I hope I have given you some ideas on how changing your stair risers can make such a huge impact on the look of your home.  There are so many materials you can use – the possibilities are endless!  Paint, tile (Mexican, slate, rock, glass) and I have even seen stained glass put on risers.  I also think this looks AMAZING on outside stairs.  Imagine those yellow tile stairs leading to a pool or the beach.  Really … I gotta stop – it’s killing me!

Hope your life is more heaven than havoc!

Missi

Fabulous Friday Favorites

Standard

Yipee!  It’s Friday!  I am not sure how I am feeling about this crazy warm weather.  If it is this warm now, what are we in for this summer?  I’m thinking scorching heat, lots of bugs and really bad humidity hair!  Wow … what a Debbie Downer!  Let me start again …

Gosh am I ever enjoying the beautiful weather this week …so much sunshine!  Better.

Today is Fabulous Friday Favorites.  Here is what I am “digging” this week:

1.  BARN DOORS

Source: re-nest.com via Missi on Pinterest

Source: decorpad.com via Missi on Pinterest

I think barn doors in a home are incredible. I tried to put one somewhere in my house, but I did not have enough wall space around my doors to accommodate one. Such a bummer! They add so much character!

2.  PALLET ART:

Pallet art is the new hot thing for art and furniture.  Today I am just going to show you the art.  I’ll save the furniture for another Friday blog.  You can find pallets anywhere from your neighbors garbage, craigslist or landscape/hardware stores.  People are usually trying to get rid of them – so that makes it even better – FREE!

Source: homedit.com via Kelly on Pinterest

Pallet’s can be such a great medium for all types of art. They can be taken apart and the individual boards used or left just like they are. I really love how rustic they look, yet can be used in all types of rooms.

3.  BRIGHT FRONT DOORS:

Source: houzz.com via Elizabeth on Pinterest

Source: google.ca via samantha on Pinterest

Source: bhg.com via Christine on Pinterest

Source: blog.hgtv.com via T. on Pinterest

Source: bhg.com via Veronica on Pinterest

Painting your front door is one of the fastest, cheapest and easiest way to change the way your entire home looks outside. If you are too scared to go bright, remember it is only paint and can be changed. I think it helps if you pick out a few colors you like and paint each color on a poster board. Tape the poster to the front door and then go out to the street to see what you think. A bright, colorful door is welcoming and says alot about the people who live there.

Hope you enjoyed my Fabulous Friday Favorites!  If you did, I would love it if you could share it with your “peeps” or follow me!    Have a wonderful, warm weekend!

Hope your life is more heaven than havoc!

Missi

Breakfast Room – Before and After

Standard

Happy Thursday!  It is beautiful here in Georgia – sunny and 80 degrees today!  The perfect day to pull weeds play tennis!  I know what I should be doing … but what I want to do is something different.  Isn’t it a woman’s prerogative to change her mind?

Today I want to show you our new breakfast room.  This space is far from done, but you can at least see the bones of the room.  I really want this area to be cozy, comfortable and some place that family and friends want to hang out.  I really cherish my time with my family at the dinner table.  We have the best conversations and lots of laughs.  Some of my best memories from my childhood are from the dinner table!

We have a tradition that we do at the end of dinner.  It’s called “The Condiment Quiz”.  Anyone who eats with us is not excused from playing the game (ask my teens friends).  Anyway – the game goes like this … I pick a topic and ask a question on that topic.  Whoever yells the answer out first is out of the game and excused from putting away the condiments.  Last one standing (or in this case sitting) has to put away all the condiments in the fridge or pantry.  My kids moan and groan about it, but I know they secretly love this game.  We have had topics from geography to sports mascots to Disney movies.

So you can see this area has to be fun and comfortable so we want to hang for a while after dinner and just be with each other.  Here is the before:

Lots of windows – I love bringing the outdoors into a room.  You can see outside from any seat in this room.

We had a bench built in the corner of the room to make a banquette.  I have always wanted a banquette and this room was made for it.  We had a huge 6 foot round table when we moved in and no matter which way we set it up it just didn’t fit.  At first I was really bummed – but once I figured out this configuration I felt better.  I had the same place build this trestle table that had built the round table.  This place is wonderful – it’s called European Antique Pine and you can see their stuff online at europeanantiquepine.com.

This banquette will easily seat 10 people and could probably squeeze in 12 if we all liked each other!  As you can see this area needs a lot of love and color.  I have ordered a cushion for the bench.  It will be in a dark chocolate brown Sunbrella material.  I like the idea of using outdoor material inside – super durable and can wipe it up easily.

I can’t wait to show you what is going on that big, blank wall.  I bought the most amazing folk art at Etsy.com.  You will have to check back and see how it turns out.

I am also in the process of having window treatments done .  Here are the fabrics I am using – I am just not a neutral girl.  I know that calm, white, beige or gray rooms are the big thing right now – and they are beautiful – but that’s just not me.  My family is loud, colorful and a little funky so I like my house to reflect the real us.

This is the fabric for the bench cushion.

This is the window fabric.  It just screams me!  All my favorite colors – sage green, orange, turquoise, red and chocolate brown.  I am doing a simple flat valance on medallions since the fabric is so busy.  It will be trimmed in a fabric call Oval Tangerine.  See below :

The color is pretty hard to see in this pic – but it is a true tangerine (color of the year!) I will also have pillows made from this fabric.  Other pillows will be included on the bench also – I will show you an after shot when it all comes together.

What do you think?  I’m pretty excited about seeing it all come together.  I especially can’t wait to have our first dinner in “color”!

Hope your life is more havoc than heaven!

Missi

Kitchen – The Details

Standard

Well … what did you think of the kitchen reveal?  Huge change huh?  Taking that wall down between the family room and the kitchen was the best move of the remodel – and it was not a load-bearing wall so we totally lucked out!

Today it’s the details …

“Excellence is in the details. Give attention to the details and excellence will come.” – Perry Paxton

Check out the granite – I used a beautiful green granite on the perimeter of the kitchen called Sea Oats.  As I mentioned yesterday, I just fell in love with this granite when I saw it.  Green is my favorite color and to look at the way it flows on my counter tops everyday makes me happy happy!

Doesn’t it look like waves in the sea?  I wish the green came out a little clearer – it is a deep sage.

Okay … I know …enough already!  We get it – it flows!  Sorry – I just really love it!

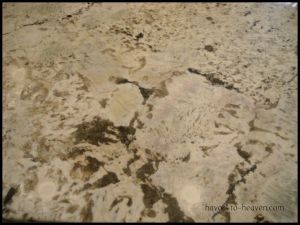
The next set of pictures shows the granite that is on the island.  It is called White Galaxy and can really look entirely different by slab.  I really liked this slab because it had some sage, brown and even a little lavender in it.  There is one section that looks like someone spilled paint on it and another section that actually sparkles.  It is amazing that this is a rock that comes out of the ground like this … wow!

You can really see the green in this picture.  I know it is hard to see the lavender – it is really subtle in the middle of the picture.

Can you see the black “slash” marks?  It looks like someone spilled paint on the counter.  I wasn’t sure if I liked it at first.  I tend to be a bit of a loon perfectionist about things and this was a bit unorthodox for me.  Now I love it … it gives the granite so much character.

Oooooo …. sparkly!  I am attracted to all kinds of sparkly things … sorta like a shark or a raccoon.  Aren’t all women?

On to tile … I picked plain antique white (bisque) subway tiles.  I did pay a little more to have the handmade tiles instead of the machine made.  They really do look good.  Not quite so flat or exact – they have personality.  I wanted the tiles to match the cabinets and not take away from the counter tops.

This picture also has a good look of the bar sink and faucets.

Speaking of sinks and faucets …

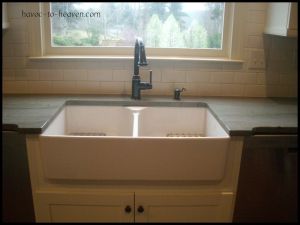
Large double farm sink by Villeroy & Boch with a single/pull-out faucet and soap dispenser.  I like how deep this sink is – it can fit a large stock pot in it and still be able to fill it with water.

I know having two dishwashers is frivolous – but I don’t know how I ever lived without them.  I can’t say this enough – if you have the room – two dishwashers is heaven. With a family of six there seems to be a never ending sink full of dishes – with two dw’s, there is no excuse to leave your dishes in the sink.

Lighting – I believe it was the great Paul Lynde from Hollywood Squares and Bewitched (am I aging myself or what?) that said,

“A room is like a stage. If you see it without lighting, it can be the coldest place in the world.”

If you think I knew this quote by heart … think again … looked it up on Brainy Quotes.  Seriously … Paul Lynde?

These are the lights over the island.  These lanterns are actually outside lights, but they had just the look I wanted and listen to the deal I got when I bought the lights.  I originally saw them online for $328 each.  Yikes!  I went up to the Progressive Lighting outlet and found them in their warehouse for $18 each.  Are you kidding?  I saved $930!!  I love a deal!!

Hardware can really change the look of a kitchen.  If you want to update your kitchen, hardware is a great and economical way to make a big impact!

I used antique bronze cup pulls on all the drawers.  I like that they give the kitchen a casual, farmhouse type vibe.


On the upper cabinet doors, I used a simple antique bronze knob.  The knob is flat – not rounded, to give it a little different look.

I made a couple of upgrades to the island.  I added beadboard to the back side and some big legs on the ends to make it feel like a table on one side.  Sorry about the shadow – I really must get myself a decent camera!

Hope you enjoyed all the kitchen detail pictures as much I enjoyed picking out the details.  Tomorrow I will post the changes to the breakfast area.  See you soon!

Hope your life is more heaven than havoc!

Missi

Kitchen – THE REVEAL

Standard

This post will be linked-up to http://missmustardseed.com/2012/03/furniture-feature-friday-link-party-4/ – and ….http://www.serenitynowblog.com/

CHECK IT OUT!

Hi All!

If you have ever remodeled a kitchen before, you know what a ton of work it is to get it to completion.  It is all in the details and that means a lot of appointments to pick out everything from faucets, appliances, cabinets, counter tops, hardware, tiles, lighting and the list goes on …

I was lucky enough to find a wonderful kitchen designer to help bring my vision to fruition.  If you ever need someone to do a beautiful kitchen design for you, please do not hesitate to contact Cheryl Pett at cherylpettdesign.com.  I was trying to design the kitchen on my own, but you really need an expert to help you with dimensions, placement, timing and a plethora of other things you would never even think about doing!

So here is the overall kitchen pictures today.  I will show you details tomorrow – granite, lighting, tile and hardware.

Cabinets are Here!!  What a mess … but it just makes the finished product that much more sweet!

This is the back wall of the kitchen.  The fridge and ovens are where the door and window used to be.  See the before again …

Isn’t the after dramatic?  Such a huge difference from where it was.  Yikes … I wish I would have emptied the counters for this picture.  But – of course this was pre-blog and I wasn’t thinking of presentation.  You can see a little bit of the breakfast room in this picture.  I am going to do another post on the breakfast room a different day.  Stay tuned …

I never thought I would say this, but the window over the sink was just too big.  I didn’t really know what to do with it so I decided to break it up with a shelf (thanks to my mom for helping with this idea)!  It did help, esthetically, but the sun beats in in the afternoon and gives me a good reason not to do dishes.  It is HOT!  Who wants to be hot while doing dishes?  Not me.  Having cafe curtains made for under the shelf.  I will be sure to show you when they are installed.

Can’t wait to show you the granite tomorrow!  The perimeter is the most amazing green granite called Sea Oats.  It is probably my most favorite thing in the kitchen.

Looking from the other side.  I wanted lots of drawers – deep, big drawers.  I definitely got them.  Love them!

A view with the island.  Oh … I love my island!!  It is 9 feet long and an amazing sage green color.  It is a subtle green – that really looks like a neutral.  I put different granite on the island and really wanted it to be one big piece.  There is nothing worse than a seam in the wrong spot … drives me crazy.  I actually went to the granite yard and picked out the slab I wanted.  This piece was exactly what I was looking for … yay!

The cabinets are an antique white with a simple shaker style.  I wanted a cottage/farmhouse look so the simpler the better.  The cabinet over the ovens has dividers for cookie sheets and the cabinet drawer under the ovens holds placemats and oven mitts.  I love that no space is wasted!  The cabinet over the fridge is so big that I fit 3 full sets of china with all the serving pieces!  Awesome!

The other side of the island – more big drawers!  Oh and Sadie in the background – she was so curious – cracks me up!

One side of the island … more drawers!  These are the perfect size drawers to be “junk” drawers.  You can never have too many “junk” drawers in a kitchen.  The other side of the island has the second pull out waste basket and my paper plate/napkin drawer.

This beverage area is on the opposite wall of the sink and fridge.  It’s a great area that has an ice maker, filtered water and a mini fridge we keep soda and juice in. The cabinet on the bottom right has dividers for serving trays – the bottom left is a pull out for my KitchenAid mixer.  The upper cabinets are barware and glasses. The middle is a cool seeded glass – I really wanted chicken wire here – but decided against it when I read about the dust.  I think I am regretting that decision – really my only regret.

This was the before of the beverage area … doesn’t it look alot bigger?  The wall is the exact same size – it’s so weird!

Okay … so that is your first sneak peek of the “reveal”.  Hope you enjoyed it.  I will be back tomorrow with the details – lighting, tile, granite, hardware and faucets.  Please check back!

Hope your life is more heaven than havoc!

Missi

Kitchen – The Mess

Standard

Hope you all had a wonderful weekend.  The weather was amazing here in Georgia – perfect days to be outside watching lacrosse games and painting furniture!

Does anyone else hate Daylight Savings?  It really messes with me the first couple of days.  When the alarm goes off at 6:15 and my body feels like it’s 5:15 – I am one crabby chick-a-dee!

Todays post shows my kitchen in the construction phase.  Removing walls, windows, doors and building it all back up again.  Just a reminder of the before:

All the kitchen cabinets have been pulled out and stacked in the garage.  The big thing is the wall between the kitchen and family room coming down.  It made a HUGE difference in this space.  We were just shocked when we saw this for the first time.  Amazing!

This is what the wall looked liked before.  Notice the carpet in the family room – that is all ripped out and replaced with hardwoods.  More to come on the family room on another day!

Another angle.  Check out those huge windows!  The natural light coming through made the area feel so open and happy!

Our contractor didn’t know he was in the pic … surprise!

The next pictures are taken from the other side.  If you remember there was a door and window in the kitchen and a tiny screen porch off the kitchen.

The door and the window on the right side of the picture come out.  In addition, the wall and door where the contractor is standing also comes down to make the breakfast area.  Take a look …

We had to bring up the floor from the porch to be even with the kitchen floor.  You actually stepped down to get into the porch originally.  We added the door out to the deck and all the windows in the room.  I love all the light coming through the windows in this area!

Drywall day … starting to look like a room!

Door and window that were on the back wall are now gone, framed and dry walled.  Doesn’t this space look so much bigger?!

Unfortunately – I didn’t know I would be blogging or I would have taken a ton more pictures.  We moved into the house before the kitchen was finished.  We went for 6 weeks with card tables lined up with a microwave, toaster oven and electric skillet.  This was the longest 6 weeks of my life – I think I would have rather been in labor for 6 weeks (okay, let’s not get carried away),  but it was pretty bad!  Four teenagers with a mini fridge does not equal heaven!

This was true havoc!  Here is a picture the day we moved in.  Don’t know what to do with something?  Just put it in the empty bowling alley called the “kitchen”.

Oh no!  This was even worse than I remember!  I’m ready to see the AFTER!  How about you?  It won’t be a true AFTER since it is still a work in progress (accessories, window treatments – you know all the fun stuff), but you will definitely be surprised to see the cabinets come in!

Happy Monday!

Hope your life is more heaven than havoc!

Missi